Floral White & Gold 21st Birthday Cake


This was the most elegant cake we ever made.
 AND WE ABSOLUTELY LOVE IT. 
It was a 3 tiered gold and white themed cake for a 21st birthday party. 


Making the Cake

Our support system consisted of dowel rods in each tier and one long dowel rod running through all 3 cakes.


10" Chocolate, 8" Red Velvet, 6" Blueberry Cake

Decorating the Cake

We covered the cake using fondant (Sliver Spoon) and used a really handy thing called "The Mat". It's super useful when you have to cover a large cake.


Biggest piece of fondant i've ever had to roll out. Great workout.
The 21 & Flowers

We used fresh roses and wrapped the stalk with cling wrap before inserting them into the cake. We also sprayed some roses with the Gold Colour Mist. 

For the 21, we used fondant mixed with tylose powder and sprayed it with Wilton's Gold Colour Mist.


Vanilla Buttercream


To get the recipe, click here. 


We adore the cascading roses and the beautiful combination of gold and white. 

It really was love at first sight. 


0

The Best Buttercream Frosting EVER

A cake is not completed without great frosting. And boy, do I have a great tasting Buttercream icing for you.

The key to making great Buttercream frosting lies in the technique. 

Ingredients

2 sticks butter
Pinch of salt
3 cups of icing sugar
1 tablespoon of milk (or heavy cream)
2 teaspoons of vanilla extract (or vanilla bean)


Technique

1. Whisk butter until very pale and fluffy. 
2. Add in the icing sugar, milk and vanilla extract on low until combined.
3. Increase the speed to medium until everything is nicely incorporated.

And that everyone, is the icing on the cake-- delicious and creamy icing

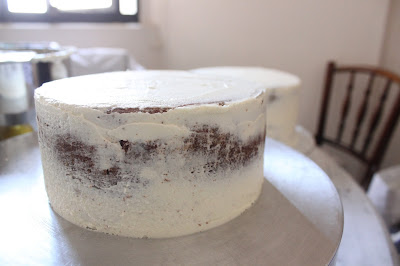
Red Velvet Cake crumb coated! 

Pro-tip: You can easily add in any extract (rose, almond, etc.) as a great alternative to this Vanilla Buttercream icing. 
0

Candy Crush Saga Cake


Candy Crush Cake- Divine!


 It seems everyone has become a victim of Candy Crush. This highly addictive game forces you to waste countless of hours swiping away at assorted candies. Fortunately for us, we never got into the game. However, we weren't spared from the countless Candy Crush invites. 


But back to the cake! This was a really fun cake to make and we enjoyed every moment of it.

Making the Cake


The grey grid was made using a fondant impression mat like the one shown below. 
(Simply place it over the fondant and press down with a fondant smoother.)

We got ours from Bake-it-Yourself for less than $5: http://www.b-i-y.com/ 
To make the border that went around the grid and score boards, we twisted pink and white fondant together and gently rolled it till it blended together. 

Candies and Scoreboards

The candies are really easy to make; just shape the fondant into the assorted candies and that's all there is to it!

We used an edible food marker to write the Target, Moves and Scores.
 Credits to Dalia for her amazing handwriting.


We dusted a little pink pearl dust on the top to give the cake an extra pop! 

So, even though neither of us have ventured beyond level 20 of this game, I'd say that this cake more than makes up for it. Level Completed! 


2

Pink Ombre Cake for Mother's Day


We baked a 5 layer Pink Ombre cake for Mother's Day! 


We had to colour and bake the individual layers separately. This was a very tiring and time-consuming process (we baked till 2am) but definitely worth it! Reminded us that hard work does pay off. And that we need more baking pans. 


Of course the outside was a pretty ombre pink as well! 


All in all, a very simple cake with no fancy fondant decorations, but just as pretty. 
To see how we piped the roses, click here

To all the mummies out there, Happy Mother's Day! 
You have the toughest job in the world and our lives just wouldn't be the same without you. 

0

Baby Blue & Baby Pink Diamond Pattern Cake


An adorable baby pink & blue diamond cake!


To get the Gold 21:
We used gold luster dust mixed with Vodka and once it was dry, we covered it in edible gold glitter. 


Pro tip! If the cake isn't high enough to accommodate 2 diamonds at the side, cut diamonds into half and use triangles instead.

0

Canine Cookies: Peanut Butter & Banana Diamonds


Dogs will go absolutely bananas for peanut butter. 
Combine the two and you have the greatest canine cookie ever made, and an extremely happy dog.


Ingredients
1 large egg 
Dog milk or water (1/4 cup)
Plain flour (2 cups)
1 banana
Peanut butter (1 tablespoon)
Honey (1 tablespoon) 

Extra stuff
Flaxseed powder (2 tablespoons)
Proden Plaque off (3 scoops) 
Recipe 

  1. Preheat your oven to 180 °C
  2. Add all the ingredients in your mixer and using your dough hook, combine everything (You can combine everything by hand if you do not have a mixer).
  3. Roll out the dough and use your cookie cutter to cut out those cookies.
  4. Bake for 10 mins until golden brown.
  5. Leave out to cool for about 10 mins before serving your dog.


I used a diamond cutter because it's small and easy for my 3 little dogs to eat.
Feel free to use cutters in a different shape! 


0
Back to Top